In this tutorial we are going to create an annotation brush tool with the use of paper.js ‘s path.Circle function. We will be using the circle as a drawing nib to draw on a canvas. To do this we will be creating a new circle at every mouse drag event and merge it into the common path rather than a common approach where we just start with creating a common path and add points to that path on each mouse drag event. If you interested in the later approach I have already covered that in this tutorial Building a Brush Tool with Paper.js: A Step-by-Step Tutorial. It is based on the technique of adding the multiple points to the common paper.js path object to draw lines on the canvas. It’s suitable when you want to implement a pen or pencil like tool. But If you like to implement a bruch like tool you can proceed with this article.
Here is the my youtube video explaining the article in simple form on the paper.js practice playground.
In the above video I used the paper.js practice playground which doesn’t require to setup the canvas and we can directly start coding our paper.js code. But in our case we will start from scratch. So let’s start creating a basic html page with all the required components like html5 canvas tag and paper.js script and other input components for configurtion purposes.
<!doctype html>
<html>
    <head>
        <script
        src="https://cdnjs.cloudflare.com/ajax/libs/paper.js/0.12.17/paper-full.min.js"></script>
        <title>Paper.js Brush tutorial - Orgfoc.com</title>
        <link rel="stylsheet" href="./style.css">
    </head>
    <body>
    	<div class="page">
            <div class="flx md-20 gap-20 aic">
                <label>
                    Fill Color
                    <input type="color" value="#ffff00" id="fill-color-picker">
                </label>
                <label>
                    Stroke Color
                    <input type="color" value="#000000" id="stroke-color-picker">
                </label>
                <label>
                    Stroke width
                    <input id="stroke-width" type="range" min="1" max="5" value="2">
                </label>
                <label>
                    Brush Size
                    <input id="brush-size" type="range" min="1" max="5" value="2">
                </label>
            </div>
            <canvas id="canvas"></canvas>
        </div>

        <script>

        // here we write the our brush code

        </script>

    </body>

</html>
Add the following code to your style.css file and keep it to the same folder where your html file is.
body{
    border-top: 10px solid #ff2600;
    font-family: arial;
    color: #333;
    font-size: 14px;
    margin:0;
    background: #f5f5f5;
    padding-top: 50px;
}
.page{
    min-height: 100vh;
    width: 100%;
    display: flex;
    flex-direction: column;
    align-items: center;
    justify-content: center;
}

.flx{
    display: flex;
}

.md-20{
    margin-bottom: 20px;
}

.gap-20{
    gap:20px;
}

.aic{
    align-items:center;
}

canvas {
    display: block;
    width: 700px;
    height:700px;
    box-shadow: 0 0 5px #0004;
    border-radius: 5px;
    background: #fff;
}
We will start by creating the paper.js project by attaching it to the canvas tag in the html page. Here select is jsut a helper function to avoid duplicating the document.getElementById statement to select the elements from DOM.
function select(id) {
    return document.getElementById(id);
}

const canvas = select("canvas");
paper.setup(canvas);
const project = paper.project;
const tool = new paper.Tool();
Now let’s select our input components from the DOM and extract their value into the following variables. This will intialize the default settings of our paper.js brush code.
const fillColorPicker = select("fill-color-picker");
const strokeColorPicker = select("stroke-color-picker");
const strokeWidthInput = select("stroke-width");
const brushSizeInput = select("brush-size");

var strokeColor = strokeColorPicker.value;
var fillColor = fillColorPicker.value;
var strokeWidth = parseInt(strokeWidthInput.value);
var brushSize = parseInt(brushSizeInput.value);
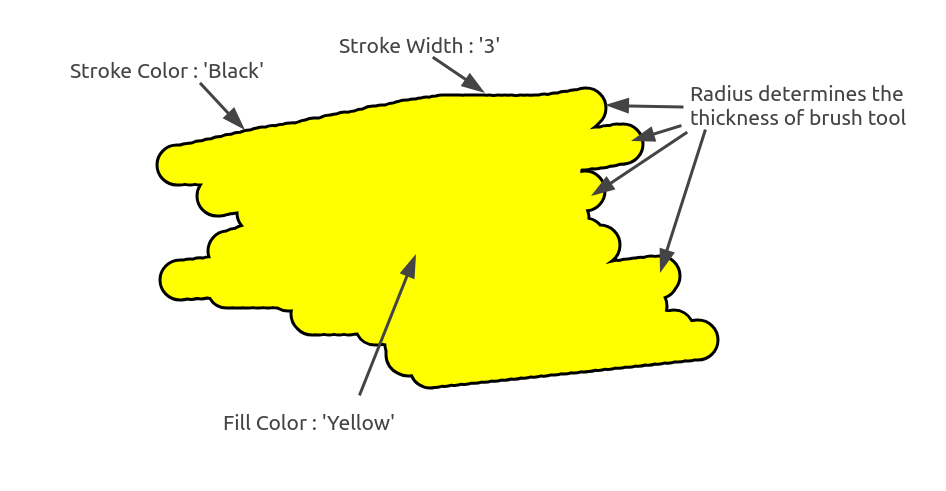
Check the image below. It will help you to understand the purpose of above four declared variables. Stroke color defines the boundry color of the painted area and stroke width defines the broder thickness. Fill Color as the name suggests fills the painted area of the canvas with the provided color value. Radius variable defines the size of your brush.

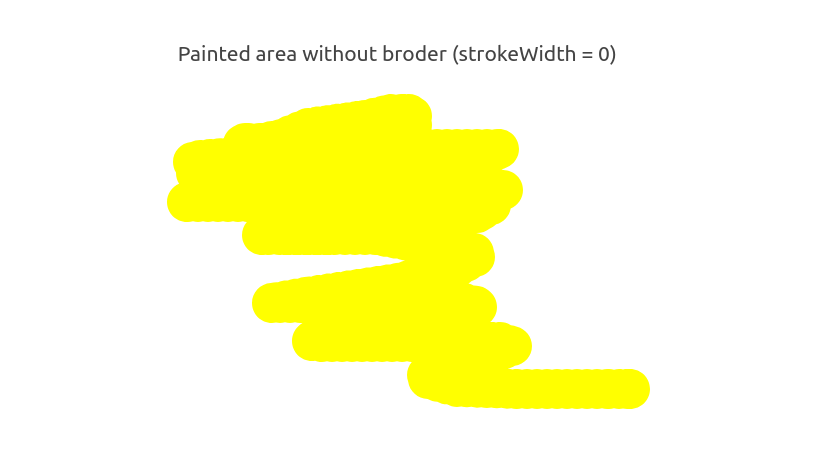
If you don’t want a border you can set the strokeWidth variable to zero. and you will get the result like this.

Let’s create a common path, you can call it as painted area. It will hold the information about the painted area in the canvas. Here we are using the paper.Path function with default value for strokeWidth and strokeColor. Keep in mind, I am usnig the ES6 shorthand propery syntax here or you can use the simple approach like mentioned bellow in the commented line.
Note: if you are not aware of the shorthand property sytax you can remapad about it here. https://developer.mozilla.org/en-US/docs/Web/JavaScript/Reference/Operators/Object_initializer#property_definitionsmap
var paintedPath = new paper.Path({
    strokeWidth, // or you can write it as strokeWidth : strokeWidth
    strokeColor
});
For dynamically changing the style settings of the brush tool we need to listen for the change event on the html input elements. We have already selected each input elements from dom so let’s add the event listner to listen value change event on each input source.
fillColorPicker.addEventListener('change', e => {
    paintedPath.fillColor = e.target.value;
    fillColor = e.target.value
});

strokeColorPicker.addEventListener('change', e => {
    paintedPath.strokeColor = e.target.value;
    strokeColor = e.target.value
});

strokeWidthInput.addEventListener('change', e => {
    paintedPath.strokeWidth = e.target.value;
    strokeWidth = e.target.value;
});

brushSizeInput.addEventListener('change', e => brushSize = e.target.value);
Here we are updating our variables and also updating the internal properties of the paintedPath object
Below is the live preview from codepen. Give it a try.
Here is the complete javascript code copy it to the bottom of the body tag in your html file.
<script>
    function select(id) {
        return document.getElementById(id);
    }

    const fillColorPicker = select("fill-color-picker");
    const strokeColorPicker = select("stroke-color-picker");
    const strokeWidthInput = select("stroke-width");
    const brushSizeInput = select("brush-size");

    const canvas = select("canvas");
    paper.setup(canvas);
    const project = paper.project;
    const view = paper.view;
    const tool = new paper.Tool();

    var strokeColor = strokeColorPicker.value;
    var fillColor = fillColorPicker.value;
    var strokeWidth = parseInt(strokeWidthInput.value);
    var brushSize = parseInt(brushSizeInput.value);


    fillColorPicker.addEventListener('change', e => {paintedPath.fillColor = e.target.value; fillColor = e.target.value});
    strokeColorPicker.addEventListener('change', e => {paintedPath.strokeColor = e.target.value; strokeColor = e.target.value});
    strokeWidthInput.addEventListener('change', e => {paintedPath.strokeWidth = parseInt(e.target.value); strokeWidth = parseInt(e.target.value)});
    brushSizeInput.addEventListener('change', e => brushSize = parseInt(e.target.value));


    // firstcreate a single path
    var paintedPath = new paper.Path({
        strokeWidth,
        strokeColor
    });

    // tool object provided by paper.js
    tool.maxDistance = 10;
    tool.onMouseDrag = onMouseDrag;


    function onMouseDrag(event){

        // we will add a new circle at each point
        let center = event.point;
        let circle = new paper.Path.Circle({
            strokeColor,
            fillColor,
            strokeWidth,
            center,
            radius : brushSize
        });

        //now lets unite each circle in single path
        let newPaintedPath = paintedPath.unite(circle);

        // now remove the old disunited path from the screen
        paintedPath.remove();

        // now replace the old path object withnew  one
        paintedPath = newPaintedPath;

        // now let's remove the standalone circle too.as we have already united that in
        // above paintedPath
        circle.remove();
        Here is the complete javascript code copy it to the bottom of the body tag in your html file.

    }

</script>
Hope you guys like my efforts to create a annotation brush tool with paper.js with paper.Circle function. If you have tried any other approach or want to suggest an improvement on this feel free to comment on this. Thanks for your time.

Leave a Reply